


Key Highlights
- Moldable plastic is a versatile material that can be molded into any you desire.
- Different types of moldable plastics are available, each with unique properties.
- Working with moldable plastic requires some essential tools and safety equipment.
- You can easily mold plastic at home using simple heating techniques.
- Adding colors and textures to your plastic designs is fun and creative.
- Moldable plastic is perfect for various projects, from crafts to cosplay costumes.
Introduction
Welcome to the world of moldable plastics, where your creative ideas can come to life! Moldable plastic is a fantastic material that allows you to mold and shape it into any form you desire. Whether you're a DIY enthusiast, an artist, or a cosplayer, moldable plastic can be a game-changer for your projects. In this blog, we will explore the fascinating world of moldable plastics, from understanding the different types to learning how to mold plastic at home.
Understanding Moldable Plastics

When it comes to moldable plastics, there are a few key terms you should be familiar with. Thermoplastic is a type of plastic that becomes soft and moldable when heated and hardens when cooled. Polystyrene and ABS are two common thermoplastics used in various applications. Polystyrene is lightweight and easy to mold, making it ideal for crafting and prototyping. On the other hand, ABS is a more durable and impact-resistant thermoplastic, often used in producing automotive parts and electronic enclosures.
The Basics of Thermoplastic Materials
Thermoplastic materials, such as polystyrene and ABS, are widely used in various industries due to their unique properties. One of the key advantages of thermoplastics is their ability to be heated and reshaped multiple times without losing their properties. This makes them perfect for DIY projects, cosplay, and lightweight crafting.
Polystyrene is a versatile thermoplastic that can be easily molded into different shapes. It is lightweight, affordable, and readily available, making it a popular choice for various applications. From small crafts and prototypes to larger projects, polystyrene offers endless possibilities.
ABS, on the other hand, is known for its strength and durability. It is commonly used in automotive parts, electronic enclosures, and household appliances. ABS has excellent impact resistance, making it suitable for projects that require a more robust material. Its versatility and stability make it a favorite among cosplayers and model makers.
Different Types of Moldable Plastics
Various types of moldable plastics are available, each with unique properties. Here is a brief overview of some popular moldable plastics and their characteristics:
|
Plastic Type |
Properties |
|
Polystyrene |
Lightweight, easy to mold, affordable, suitable for small crafts and prototypes |
|
ABS |
Strong, durable, impact-resistant, ideal for automotive parts and cosplay |
|
Polymorph |
Biodegradable, reusable, can be shaped by hand or using tools |
|
Instamorph |
Easy to mold, strong when cooled, can be reheated and modified |
|
PVC |
Rigid, durable, resistant to chemicals and weather |
These moldable plastics can be found in various forms, such as pellets or beads, which can be melted and shaped into any desired form. The choice of moldable plastic depends on the specific project requirements and the desired properties of the final product.
Essential Tools and Materials for Working with Moldable Plastic

Working with moldable plastic requires essential tools and materials to ensure a safe and successful molding process. Here are a few items you will need:
- Safety equipment: It is crucial to protect yourself while handling hot plastics. Wear gloves and use safety goggles to prevent any accidents.
- Moldable pellets: These raw materials will be melted and shaped into your desired form.
- Polly Plastics: A popular brand that offers high-quality moldable plastic pellets.
- Heat source: You can melt the plastic pellets with hot water or a heat gun.
These basic tools and materials will prepare you for a successful molding experience.
Safety Equipment for Handling Hot Plastics
Safety should always be a priority when working with hot plastics. Here are some essential safety equipment you should have:
- Safety goggles: Protect your eyes from any potential splashes or fumes that may occur during the molding process.
- Heat-resistant gloves: These will protect your hands from burns while handling hot plastic or tools.
- Ventilated workspace: Work in a well-ventilated area to avoid inhaling any fumes that may be released during the melting process.
It is essential to follow the instructions provided by the manufacturer of the moldable plastic pellets to ensure safe handling and molding. Always take necessary precautions to protect yourself and those around you.
Selecting the Right Type of Moldable Plastic for Your Project
Choosing the right type of moldable plastic for your project is crucial to achieving the desired results. Consider the following factors when selecting your plastic:
- Project requirements: Determine the specific needs of your project. Do you need a lightweight material or something more durable? Consider the properties of different plastics to find the best fit.
- Moldability: Some plastics are easier to mold and shape than others. If you're a beginner or working on detailed designs, opt for a more forgiving plastic that is easier to work with.
- Specific application: Different plastics excel in different applications. For example, if you're working on a cosplay costume, ABS offers excellent strength and impact resistance.
By considering these factors, you can select the suitable moldable plastic that will meet your project requirements and ensure successful molding.
Step-by-Step Guide to Molding Plastic at Home
Molding plastic at home is a fun and rewarding DIY project. Here's a step-by-step guide to get you started:
- Prepare your workspace and materials: Set up a clean and well-ventilated area for your molding process. Gather all the necessary tools and materials, including the moldable plastic pellets.
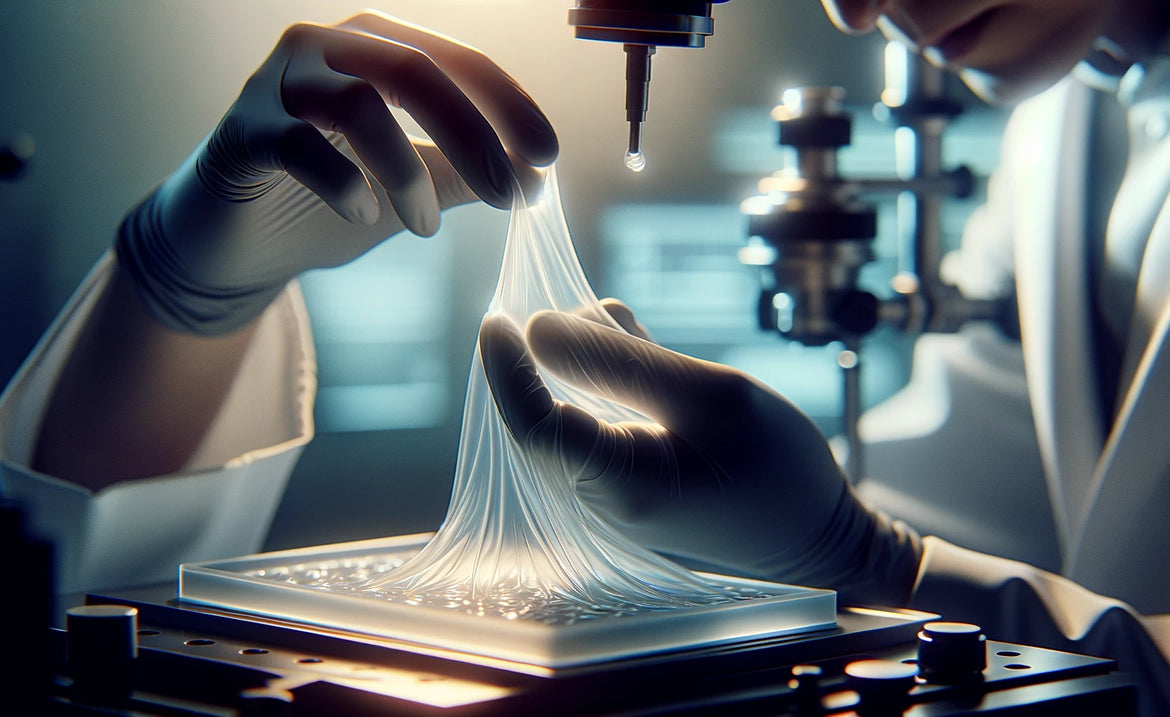
- Heating techniques: Choose your preferred heating method, either hot water or a heat gun. Heat the plastic pellets until they turn from white to clear and become soft and pliable.
- Shaping and molding: Once the plastic is heated, quickly remove it from the heat source and mold it into your desired shape using your hands or tools.
- Cooling and setting: Allow the plastic to cool and harden. It will become strong and permanent once cooled.
- Finishing touches: Sand, drill, or paint your molded plastic creation to add any desired finishing touches.
With these simple steps, you can easily mold plastic at home and create your unique masterpieces.
Preparing Your Workspace and Materials
Before molding plastic, preparing your workspace and gathering all the necessary materials is essential. Here are a few steps to get you started:
- Set up a clean and well-ventilated area: Choose a workspace free from clutter and has proper ventilation to ensure a safe working environment.
- Gather your tools and materials: Ensure you have all the required tools and materials within easy reach. This includes moldable plastic pellets, safety equipment, and a heat source.
- Protect your work surface: Cover your work surface with a heat-resistant mat or parchment paper to prevent any damage or sticking of the plastic.
- Organize your tools: Keep your tools neatly arranged and easily accessible. This will make the molding process smoother and more efficient.
By preparing your workspace and materials beforehand, you can ensure a seamless molding experience and focus on creating your plastic masterpiece.
Heating Techniques for Moldable Plastic Pellets
There are different heating techniques you can use to melt moldable plastic pellets. Here are two popular methods:
- Hot water: Fill a heat-resistant container with hot water (around 150 degrees Fahrenheit). Place the plastic pellets in a heat-safe bag or mesh and submerge them in the hot water. Stir occasionally until the pellets become clear and pliable.
- Heat gun: Use a heat gun on the low or medium setting to warm the plastic pellets. Hold the heat gun a few inches away from the pellets and move it in a circular motion until they melt and become moldable.
Both methods require caution and supervision. Remember to use safety equipment like gloves and goggles while handling hot plastics. Choose the heating technique that suits your preferences and available tools.
Shaping and Molding Your Plastic Creation
Once the moldable plastic pellets have been heated and melted, it's time to shape and mold them into your desired creation. Here are a few tips to help you through the process:
- Use your hands or tools: Depending on the complexity of your design, you can shape the plastic by hand or use tools like molds or sculpting tools.
- Work quickly: Moldable plastic hardens as it cools, so it's important to work swiftly and efficiently to achieve the desired shape.
- Adjust if needed: If unsatisfied with the initial result, you can reheat the plastic and modify it until you achieve the desired outcome.
- Allow the plastic to cool and set: Once you're happy with the shape, let the plastic cool and harden. It will become solid and permanent upon cooling.
With practice and experimentation, you can create intricate and unique plastic designs.
Adding Colors and Textures to Your Plastic Designs

Adding colors and textures to your moldable plastic designs can take your creations to the next level. Whether you want a vibrant and colorful piece or a textured and patterned design, there are various techniques you can use.
Techniques for Coloring Moldable Plastics
There are several techniques you can use to add color to your moldable plastics:
- Polly Plastics color pellets: These specialized pellets are designed to add vibrant colors to your plastic creations. Simply melt them with the moldable pellets, and the color will be infused throughout the plastic.
- Permanent markers: You can also use permanent markers to color the surface of the cooled plastic. Draw directly on the plastic to add intricate designs or patterns.
- Acrylic paints: Apply acrylic paints to the cooled plastic using a brush or sponge. This allows you to create various effects and blend different colors.
- Powder paint or alcohol dye: Mix powder paint or alcohol dye with the molten plastic before molding. This will result in a uniformly colored plastic.
Experiment with different coloring techniques to achieve the desired look for your moldable plastic creations.
Creating Textures and Patterns in Plastic Projects
Texturing and adding patterns to your moldable plastic projects can enhance their visual appeal. Here are a few techniques you can use:
- Imprinting: Press objects with interesting textures into the soft plastic to create imprints. This could be anything from fabric to leaves or even textured stamps.
- Carving: Use carving or heated tools to create intricate patterns or designs on the plastic surface.
- Painting techniques: You can use various painting techniques like sponge painting, splattering, or stenciling to add texture and visual interest to your plastic creations.
- Embossing: Heat embossing techniques can be applied to plastic using heat guns or heating stamps to create raised patterns.
Get creative and experiment with different textures and patterns to make your moldable plastic projects truly unique.
Finishing Touches for Your Moldable Plastic Masterpieces

The finishing touches can make all the difference when creating moldable plastic masterpieces. Whether you're looking to smooth and polish your finished pieces or add hardware and other elements to enhance their appearance, you can use various techniques and materials. This section will explore these finishing touches and how they can elevate your moldable plastic creations.
Smoothing and Polishing Finished Pieces
After molding and shaping your plastic masterpiece, you may notice rough edges or imperfections that must be smoothed out. One way to achieve a smooth finish is by using sandpaper. Start with a coarse grit sandpaper to remove any larger bumps or uneven surfaces. Gradually work up to a finer grit sandpaper for a smoother finish. Another option is to use a heat gun to gently heat the surface of the plastic, allowing it to become malleable and smoothing out any imperfections. Be cautious not to overheat the plastic, as it may lose shape.
You can use a polishing compound or a varnish to enhance the appearance of your finished pieces further. Apply the polishing compound to a soft cloth and gently rub it onto the plastic surface in circular motions. This will help to remove any scratches and bring out the shine of the plastic. Alternatively, a clear varnish can give your plastic creations a glossy finish. Apply the varnish evenly with a brush or sponge, following the manufacturer's instructions for drying and curing times.
Adding Hardware and Other Elements to Your Creations
Consider adding hardware and other decorative elements to take your moldable plastic creations to the next level. Various options are available, whether you're making jewelry, accessories, or functional items, such as brackets or hooks.
For jewelry and accessories, you can attach clasps, jump rings, or earring hooks using superglue or by drilling small holes in the plastic and using jump rings or wire to connect the pieces. You can embed beads, gems, or other small decorative items into the plastic while still malleable. This allows you to create unique and personalized designs.
For functional items, such as brackets or hooks, you can use screws, nuts, and bolts to secure the plastic to other surfaces. Be sure to choose hardware compatible with the type of plastic you work with and ensure proper adhesion for a sturdy and durable attachment.
When adding hardware or other elements to your moldable plastic creations, it's essential to consider their weight and the strength of the plastic. Ensure the plastic is thick enough to support the added weight, and use reinforcement techniques if needed.
Innovative Projects with Moldable Plastic

Moldable plastic offers endless possibilities for innovative projects. From DIY jewelry and accessories to custom gadgets and tools, there are many exciting ways to unleash your creativity. This section will explore some inspiring ideas for using moldable plastic in crafting and DIY endeavors.
DIY Jewelry and Accessories from Moldable Plastic
Creating your jewelry and accessories is a fun and rewarding way to express your style. Moldable plastic allows you to design and make unique pieces that are lightweight and durable. You can mold plastic beads, pendants, or charms in various shapes and sizes. Add color to your creations by using colored plastic pellets or by painting the surface with acrylic paints or permanent markers. Attach findings, such as earring hooks, chains, or clasps, to complete your jewelry designs.
Custom Gadgets and Tools Using Thermoplastic
Need a custom gadget or tool for a specific task? Moldable plastic can come to the rescue. Whether you need a custom grip for your tools, a bracket for mounting equipment, or a specialized tool for a particular job, you can mold and shape plastic to meet your needs. The versatility of moldable plastic allows you to create functional and unique gadgets and tools. Use your imagination and problem-solving skills to design and bring your ideas to life.
Sculptures and Art Pieces with Moldable Plastics
Moldable plastic can also be used to create sculptures and art pieces. The ability to mold the plastic into any desired shape opens up a world of possibilities for creative expression. Whether you want to create small decorative pieces or larger sculptures, moldable plastic is lightweight and durable. You can paint the surface of the plastic, add texture, or combine it with other materials to create visually stunning art pieces and decorations.
Troubleshooting Common Issues in Plastic Molding
While working with moldable plastic, you may encounter some common issues that can affect the quality of your final product. This section will discuss two common issues - dealing with bubbles and imperfections, and tips for reheating and adjusting your projects.
Dealing with Bubbles and Imperfections
Bubbles and imperfections can occur when molding plastic. To minimize the occurrence of bubbles, make sure to thoroughly heat the plastic pellets until they turn from white to clear. This ensures the plastic is adequately melted and any trapped air bubbles are released. If bubbles still occur, gently tap the mold or use a heat gun to remove them.
To address imperfections, such as rough surfaces or uneven finishes, you can use sandpaper or a heat gun to smooth out the plastic. Sanding should be done gradually, starting with coarse grit sandpaper and progressing to finer grits for a smoother finish. Be careful not to overheat the plastic when using a heat gun, as it can lose shape. Apply heat evenly and in short bursts, making the plastic malleable and smoothing imperfections.
Tips for Reheating and Adjusting Your Projects
One of the benefits of moldable plastic is its ability to be reheated and modified. If you're not satisfied with the shape or design of your project, you can reheat the plastic to make adjustments. To reheat the plastic, use a heat gun or hot water above 150 degrees Fahrenheit. Once the plastic becomes malleable, you can reshape it to your desired form.
When making adjustments, be mindful of the plastic's temperature and avoid overheating, as it can lead to deformation or loss of detail. Take your time and make gradual changes until you achieve the desired result. Remember that moldable plastic can be reheated and modified multiple times, allowing you to perfect your projects.
Conclusion
In conclusion, mastering the art of creating moldable plastic masterpieces opens up a world of creativity and innovation. Understanding the basics of thermoplastic materials, selecting the right type for your project, and following safety protocols are crucial steps. Using the right tools and techniques, you can shape unique designs, add colors and textures, and finish with finesse. Explore innovative projects like DIY jewelry, custom gadgets, and sculptures to unleash your artistic potential. Troubleshooting common molding issues and storing plastic pellets properly ensure smooth crafting experiences. Embrace the versatility of moldable plastics and embark on a journey of crafting personalized creations.
Frequently Asked Questions

What is the best way to store moldable plastic pellets?
To store moldable plastic pellets, it is best to keep them in a cool and dry place. Airtight containers or resealable bags can help prevent moisture from affecting the pellets. Craft stores and online retailers like Forged Acrylics and Amazon offer suitable storage options for moldable plastic pellets. It is also advisable to check the manufacturer's instructions for specific storage recommendations.
Can moldable plastic be reused after it has hardened?
Yes, moldable plastic can be reused even after it has hardened. Reheat the hardened plastic using a heat gun or hot water above 150 degrees Fahrenheit to make it malleable again. This makes moldable plastic an eco-friendly option as it can be reused for different projects, reducing waste. Its ability to be reheated and reshaped also makes it popular among cosplayers who regularly create and modify costume accessories.
