


Key Highlights
- Thermoplastic molding is a versatile manufacturing process used to produce many plastic products.
- Understanding the basics of thermoplastics is essential for successful molding.
- Different types of thermal molding techniques include injection molding, blow molding, compression molding, and extrusion molding.
- Preparing for your first thermoplastic molding project requires essential tools, materials, and safety measures.
- A step-by-step guide to simple molding techniques, such as injection molding, compression molding, and extrusion molding, can help beginners get started.
- Advanced thermoplastic techniques like rotational molding and blow molding allow for the creation of complex shapes and hollow parts.
Conclusion: Thermoplastic molding offers beginners a cost-effective and efficient way to produce plastic parts in-house
Introduction
Thermoplastic molding at home offers a rewarding journey into the world of creating custom plastic parts. By understanding the basics and techniques, you can unleash your creativity with endless possibilities. Whether you're intrigued by injection molding, compression molding, or extrusion molding, each method has unique benefits and applications in the DIY realm. With essential tools, safety precautions, and a dash of creativity, you're all set to embark on your molding adventure. Ready to dive into the exciting realm of thermoplastic molding with elastomers? Let's get started!
Understanding Thermoplastic Molding
Thermoplastic molding involves using heat to melt plastic, which can be molded into various shapes before cooling and hardening. Understanding the basics of thermoplastics, including materials like nylon, is crucial. These materials can be melted and reshaped multiple times, unlike thermosetting polymers. Different techniques include injection molding, compression molding, and extrusion molding. Injection molding, for example, requires an injection molding machine to fill a mold with molten plastic. Each technique has its unique process, benefits, and applications, making it essential to grasp the fundamentals before embarking on your molding projects.
The Basics of Thermoplastics
Thermoplastics are polymers that can be melted and reshaped multiple times without significant chemical change. This characteristic makes them highly versatile and recyclable. They soften when exposed to heat and solidify when cooled, allowing for various molding techniques. Thermoplastics are widely used due to their flexibility, impact resistance, and ease of processing. Common examples include polyethylene, polypropylene, and PVC. Understanding the basics of thermoplastics is crucial for anyone venturing into molding projects, as it forms the foundation for choosing the suitable material for the desired application.
Types of Thermoplastic Molding Techniques
Thermoplastic molding techniques encompass various methods, each with its unique approach. Injection molding stands out for its precision, utilizing an injection molding machine to create parts with intricate details. Compression molding, on the other hand, involves shaping materials in a heated mold, ideal for larger production runs. Extrusion molding is favored for continuous shapes like pipes and tubing. Understanding these diverse techniques allows beginners to explore the versatility of thermoplastics and select the most suitable method for their projects.
Preparing for Your First Thermoplastic Molding Project
Essential Tools and Materials for Thermoplastic Molding:
Before diving into your first thermoplastic molding project, ensure you have the necessary tools and materials. A drill press, CAD software for design, and an injection molding machine are fundamental. Safety gear like goggles, gloves, and mold release agents for smooth demolding is crucial. Understanding mold design and temperature control is essential for successful molding. Investing time in print preparation software can streamline the process. The right equipment and knowledge, including a build platform for efficient printing, will set you up for a smooth start in your thermoplastic molding journey.
Essential Tools and Materials for Thermoplastic Molding
You will need essential tools and materials to ensure a successful thermoplastic molding project. The must-haves include an injection molding machine, CAD software for mold design, and mold release agents. Other necessities are a drill press for creating mold cavities, an aluminum mold frame for stability, a water bath for temperature control, and a blender for mixing plastic pellets. Additionally, invest in quality plastic pellets suited for your desired outcome, ensuring a wide variety of materials for versatility. These tools and materials are crucial for achieving precise, high-quality thermoplastic molding results.
Safety Measures to Consider
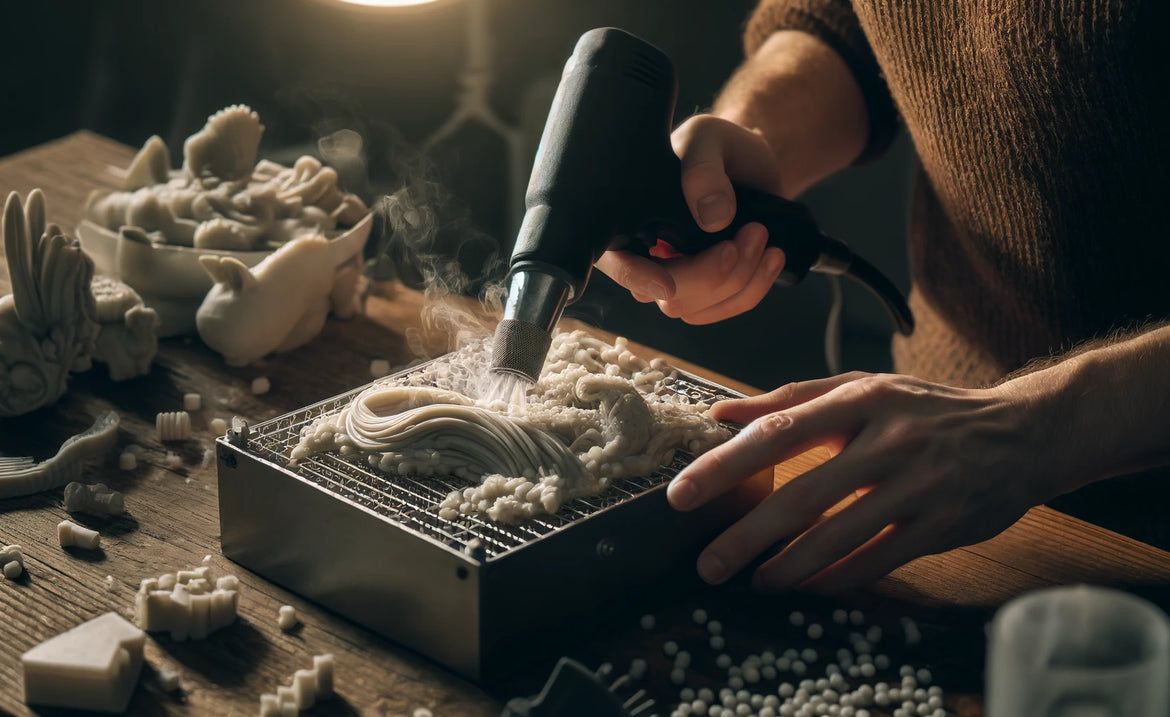
Before engaging in thermoplastic molding at home, it is crucial to prioritize safety measures. Always wear appropriate protective gear, including gloves and safety glasses, to protect yourself from hazards. Ensure proper ventilation in your workspace to avoid inhaling harmful fumes emitted during the molding process. Familiarize yourself with your equipment, such as the plastic mold and injection molding machine, and follow all operating instructions meticulously to prevent accidents. Regularly inspect tools and machines for wear or damage; never leave the equipment unattended. Remember, safety first is critical to a successful molding experience.
Step-by-Step Guide to Simple Molding Techniques
Choose the most straightforward thermoplastic molding technique to begin with. Start by melting thermoplastic pellets in a container. Next, pour the molten plastic into the first half of the mold, ensuring even distribution. Use a suitable technique, such as epoxy injection or compression molding, based on your project needs. Allow the first half of the mold to cool and solidify, creating half of the mold. Then, carefully separate the mold halves to reveal the finished piece made with equal parts resin and silicone. This straightforward process lays the foundation for more advanced molding techniques in your skillset.
Injection Molding for Beginners
Understanding injection molding is crucial to start your journey into thermoplastic molding at home. This popular technique involves injecting molten plastic into a mold cavity, typically made of traditional CNC-machined metal molds. However, for beginners, using an injection molding machine simplifies the process and reduces the long lead times associated with traditional molds. Start by designing the mold halves using CAD software. Ensure proper temperature control to avoid air bubbles. Once molded using a plastic injection molding machine, release the part from the mold. While initial effort is needed, the DIY injection molding process, also known as molders, offers material choice and part design flexibility with a cylinder to inject the molten plastic. Experiment with small parts before tackling more significant projects.
Compression Molding: A Basic Introduction
Compression molding is a versatile thermoplastic molding technique that involves placing a pre-measured amount of plastic material in a heated mold cavity. The mold is then closed, applying pressure to compress and shape the material. This process is well-suited for producing parts with intricate details and complex geometries. Compression molding is often used for manufacturing products like automotive components, aerospace parts, and consumer goods. By understanding the basics of compression molding, beginners can explore this method as an alternative to other molding techniques in their home workshops.
Extrusion Molding: Getting Started
Extrusion molding is a versatile technique that involves pushing molten thermoplastic material through a die to create a specific shape. It is commonly used for producing continuous shapes such as pipes, tubing, and sheets. To get started with extrusion molding, you will need an extrusion machine equipped with a heated barrel, a screw mechanism to push the material forward, and a die to shape the extrudate. Understanding the temperature control and speed of the extrusion process is crucial for achieving the desired product quality. Experiment with different materials and extrusion parameters to explore the endless possibilities of this molding technique.
Advanced Thermoplastic Molding Techniques

Rotational molding is ideal for creating complex shapes by evenly distributing molten plastic within a mold using rotational movement. Blow molding produces hollow parts like bottles through air pressure, inflating molten thermoplastic within a mold cavity. These advanced techniques demand attention to detail in mold design and temperature control to ensure high-quality, precise outcomes. Leveraging these methods allows for intricate and diverse thermoplastic products that cater to various industry needs, showcasing the versatility and capabilities of thermoplastic molding in crafting intricate and customized parts.
Rotational Molding for Complex Shapes
Rotational molding, or roto-molding, is ideal for creating intricate, large, complex shapes. This NLP technique involves rotating the mold on multiple axes while gradually heating and cooling it. The process ensures uniform thickness and high durability for the final product. Rotational molding is commonly used to manufacture storage tanks, playground equipment, and medical products. By understanding the principles of rotational molding, beginners can explore innovative possibilities in thermoplastic molding at home. Mastering this technique opens doors to crafting unique and customized items quickly and precisely.
Blow Molding: Creating Hollow Parts
For creating hollow parts, blow molding is a widespread technique. It involves melting thermoplastic material and forming it into a hollow shape by blowing air into a cavity. The process begins with a mold that is filled with molten plastic. Then, air pressure expands the plastic against the mold walls, creating the desired shape. This method is commonly used for manufacturing plastic bottles, containers, and other hollow products. Blow molding offers cost-effective production of seamless, lightweight, and durable hollow parts with excellent consistency and uniformity.
Finishing and Post-Processing Your Molding Projects
Once you have successfully molded the plastic parts, the next step is to finish and post-process them. This involves trimming any excess material, painting or applying a surface finish to enhance the appearance, and assembling the different components if necessary. Trimming is done to remove any rough edges or flash that may be present on the parts. Painting or applying a surface finish can improve the aesthetics of the parts and make them more appealing. Assembly involves joining different parts together to create the final product. These finishing touches ensure the molded parts meet the desired specifications and requirements.
Trimming, Painting, and Assembly
Trimming is an essential step in the post-processing of molded parts. It involves removing any excess material or flash that may be present on the parts. This can be done using various tools, such as a sharp knife or a file. Trimming ensures that the parts have clean edges and a smooth surface finish.
Once the trimming is complete, painting or applying a surface finish can be done to enhance the appearance of the parts. This can be done using spray paint or a coating such as clear varnish or a textured finish. Painting or applying a surface finish can also help to protect the parts from environmental factors such as UV radiation or moisture.
Assembly is the final step in the post-processing of molded parts. It involves joining different components together to create the final product. This can be done using various methods, such as adhesives, fasteners, or heat welding. Assembly ensures that the parts are securely and accurately joined and that the final product is functional and ready for use. These finishing touches are essential to ensure that the molded parts meet the desired specifications and requirements and enhance the final product's overall quality and appearance.
Tips for Quality Finishing
Achieving a high-quality finish on molded parts is essential for aesthetic and functional reasons. Here are some tips to ensure quality finishing:
- Pay attention to the surface finish of the mold. A smooth mold surface will produce a smoother finish on the molded parts.
- Use materials with good surface properties. Certain thermoplastics, such as ABS or PC, have better surface finish characteristics than others.
- Minimize the visibility of print lines by choosing the mold's appropriate printing settings and orientation.
- Consider secondary processes such as sanding, polishing, or coating further to enhance the surface finish of the molded parts.
- Take care during handling and assembly to avoid any scratches or damage that could affect the appearance of the parts.
- Regularly clean and maintain your molding equipment to prevent contamination or degradation of the molds or parts.
By following these tips, you can achieve professional-looking and high-quality finishes on your molded parts.
Troubleshooting Common Molding Problems
Despite the best efforts, molding problems can sometimes occur during the injection molding. Understanding and troubleshooting these common issues can help ensure successful molding projects. Two common molding problems are warping and shrinkage.
Dealing with Warping and Shrinkage
Warping is the deformation or distortion of a molded part, typically caused by uneven cooling or excessive internal stress. To minimize warping, it is essential to carefully control the temperature and cooling rate during the molding process. This can be done by adjusting the injection and cooling parameters and using cooling fixtures or jigs to ensure uniform cooling.
Shrinkage is the reduction in size of a molded part as it cools and solidifies. It is a natural occurrence in thermoplastic molding and can be managed by selecting the material with minimal shrinkage properties. Optimizing the mold design and process parameters, such as melt temperature and injection pressure, can help reduce shrinkage.
By understanding the causes and implementing appropriate measures to address warping and shrinkage, you can minimize these common molding problems and ensure your molded parts' quality and dimensional accuracy.
How to Avoid Incomplete Molding
Incomplete molding occurs when the molten plastic does not fill the mold cavity, resulting in missing or poorly formed features on the molded part. Ensuring proper material flow and injection pressure is essential to avoid incomplete molding.
Proper material flow can be achieved by optimizing the mold design, gate location, and runner system. This allows for efficient and uniform distribution of the molten plastic throughout the mold cavity. Injection pressure plays a crucial role in ensuring the complete filling of the mold cavity. It should be set appropriately to overcome any resistance and ensure proper material flow.
Regularly monitoring and adjusting the injection pressure and conducting mold flow analysis or simulations can help identify and address any issues that may affect the completeness of the molding process. Following these guidelines, you can avoid incomplete molding and achieve fully formed and functional molded parts.
Conclusion
In conclusion, mastering thermoplastic molding opens a world of creative possibilities. Understanding the basics, safety precautions, and techniques can pave the way for successful projects. Whether delving into injection molding or exploring advanced methods like rotational molding, attention to detail is critical. Remember, finishing touches matter – from trimming to painting. Troubleshooting common issues like warping ensures smooth production. Embrace the learning curve, seek efficient tool usage, and keep experimenting. Your thermoplastic molding skills will flourish with patience and practice, turning your ideas into tangible creations.
Frequently Asked Questions
Can I Mould Thermoplastic at Home?
Yes, molding thermoplastic at home using a benchtop injection molding machine is possible. This DIY approach allows small-scale production and prototyping projects to be carried out in a home workshop setting.
What Are the Most User-Friendly Molding Techniques for Beginners?
For beginners, the most user-friendly molding techniques include using a benchtop injection molding machine and a desktop SLA 3D printer. These techniques are relatively simple and require low-cost equipment, making them accessible for beginners.
How to Choose the Right Thermoplastic Material for My Project?
When choosing the suitable thermoplastic material for your project, consider factors such as project requirements, desired properties of the final product, and the specific properties of different thermoplastics. Conducting thorough research and consulting material data sheets can help guide your material selection process.
Tips for Efficiently Using Thermoplastic Molding Machines
To efficiently use thermoplastic molding machines, follow these tips: regularly maintain and clean the machine, optimize operating parameters for each material, ensure proper material handling and storage, and follow safety guidelines and procedures.
